Tracking Code for Leads
The Video Stats tracking code is a small JavaScript snippet you install on your website that connects YouTube clicks to the leads you collect. Once it's installed, any time a visitor who came from one of your tracking links submits an email opt-in form on your site, Video Stats automatically attributes that lead back to the exact video and link that brought them in.
You don't have to tell the script which forms to watch — it detects opt-in submissions automatically.
What "Lead Tracking" Means
A lead is anyone who submits their email (and optionally their name) on one of your pages — newsletter signups, free training opt-ins, lead magnets, "get notified" forms, and so on.
Without lead tracking, you can see how many people clicked your YouTube tracking links, but you can't see which videos are actually generating subscribers. With lead tracking installed, every opt-in is connected back to:
- The video that drove the click
- The specific tracking link they clicked
- The day, device, browser, and country of the visitor
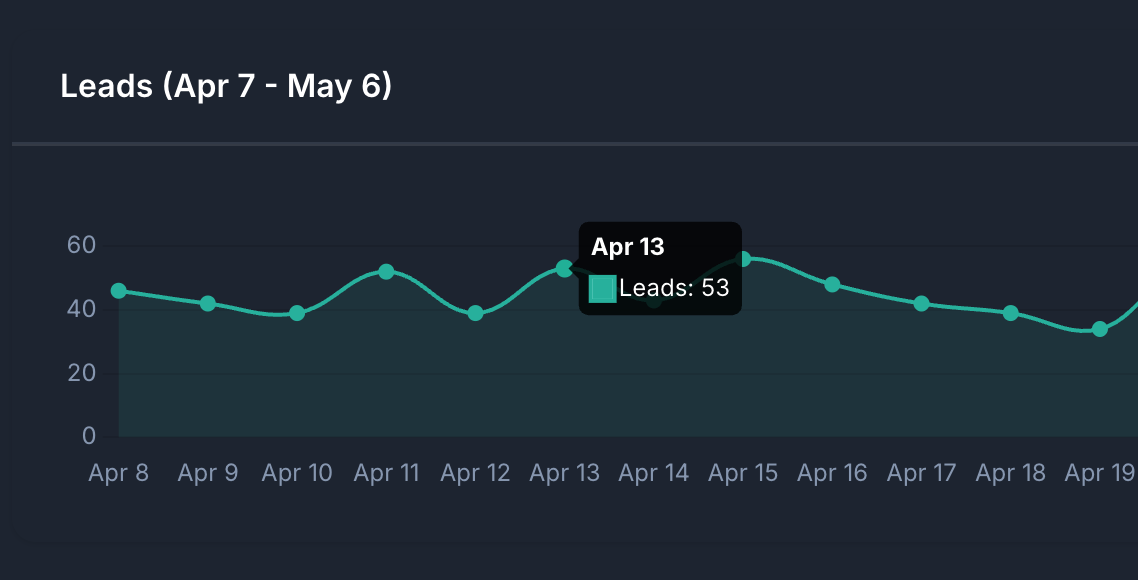
This is what powers the leads column on your dashboard, the Top Converting Videos widget, and every "leads per video" metric in Video Stats.
Where to Get Your Tracking Code
- Go to Settings > Tracking Code in your dashboard
- You'll see a code snippet pre-filled with your workspace ID
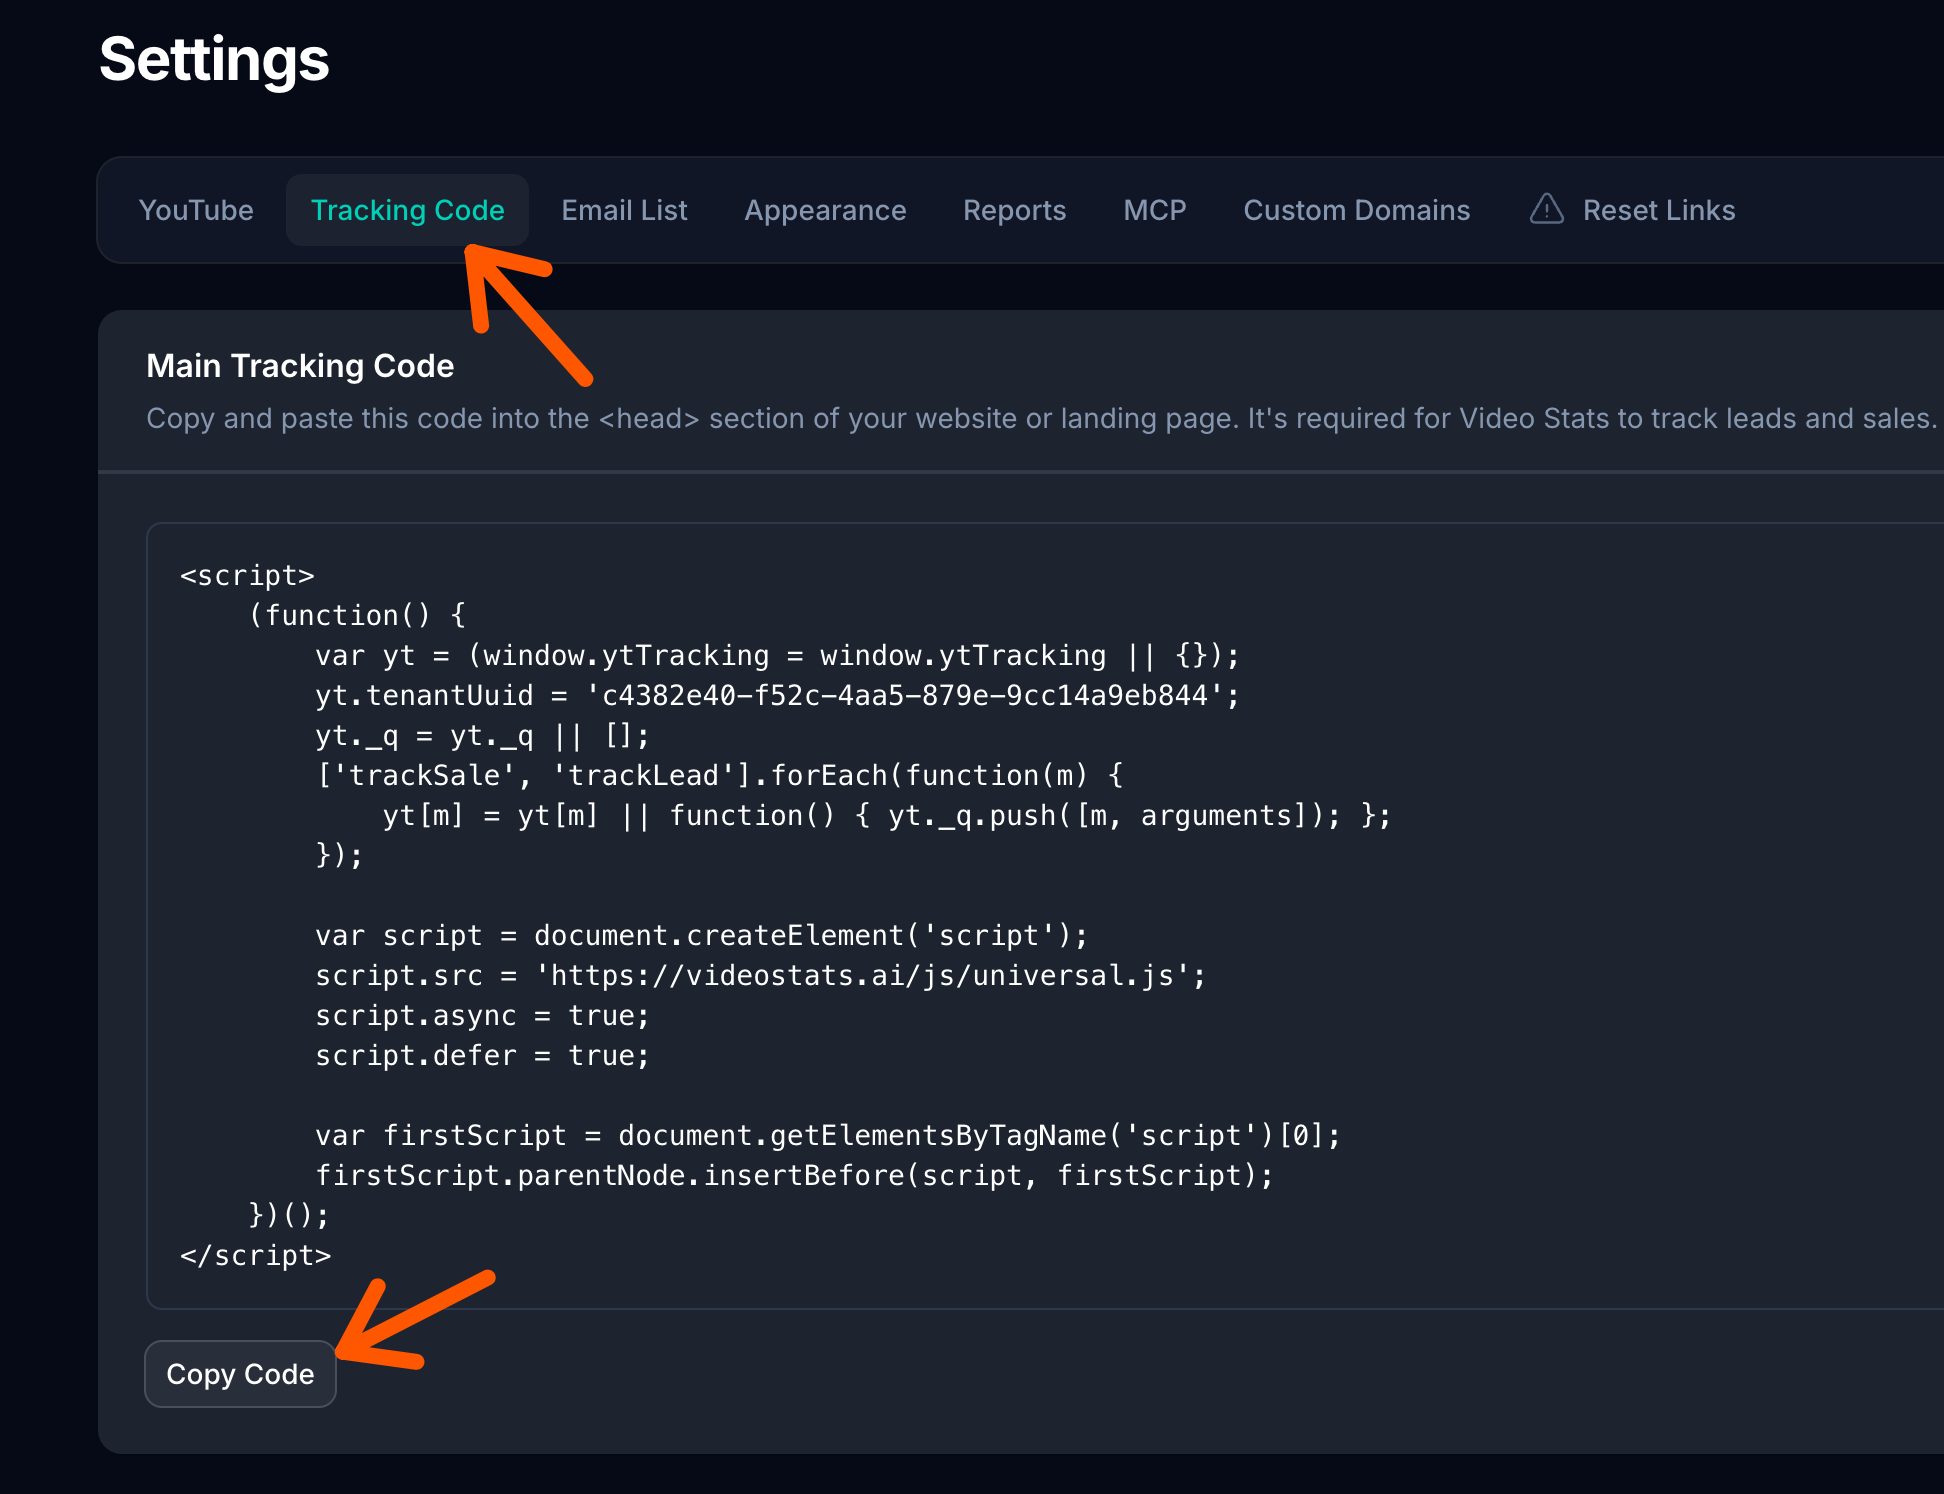
Click Copy to copy the full snippet to your clipboard.
Step 1 — Copy the Tracking Code
In Settings > Tracking Code, click the Copy button next to the code block. The code is unique to your workspace, so don't share it with code from another channel — it tags conversions to the right account.
Step 2 — Add It to Your Website
Paste the code into the <head> section of every page where you want to track opt-ins, just before the closing </head> tag.
Common places to install it:
- Your main site (recommended for most users): install it sitewide so any opt-in form, anywhere on your site, is tracked automatically. Most CMS platforms have a "header script" or "site-wide script" setting that does this in one place.
- Specific landing pages: if you only want to track certain pages, paste the code into just those pages'
<head>sections. - Funnel builders (ClickFunnels, Kartra, Kajabi, Leadpages, etc.): look for a "header tracking code" or "custom HTML" setting at the funnel or page level.
- WordPress: use a plugin like Insert Headers and Footers, or paste it directly into your theme's
header.php. - Webflow / Squarespace / Wix: all three have a built-in custom-code field for
<head>content in their site settings.
You only need to install the snippet once per page. Don't paste it in the body, and don't paste it more than once on the same page.
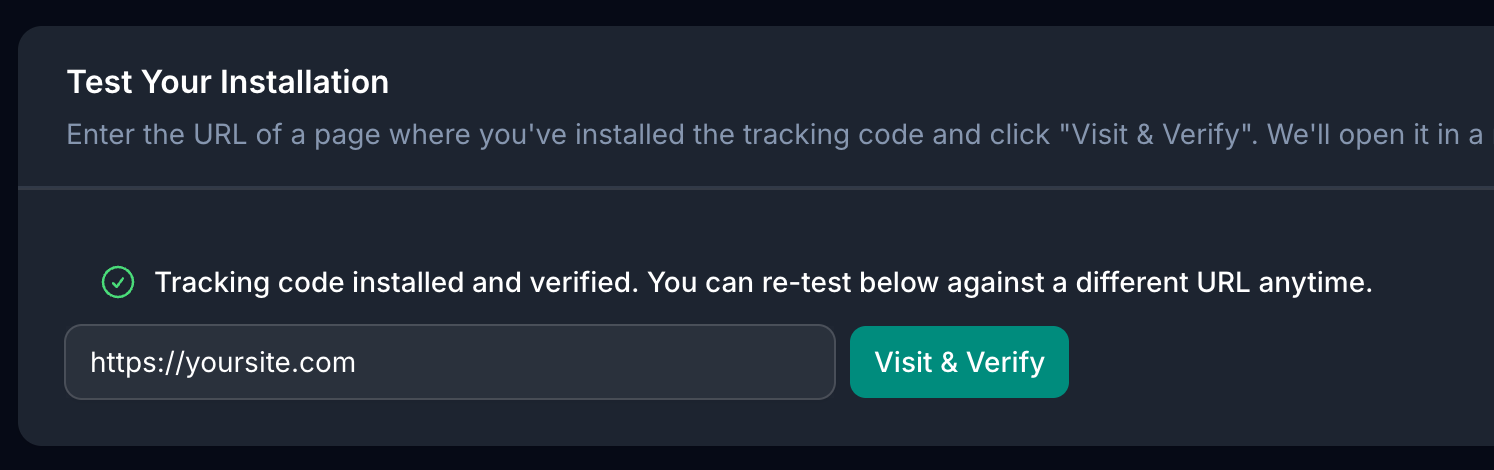
Step 3 — Verify the Installation
Once the code is on your site, head back to Settings > Tracking Code to confirm everything is wired up correctly.
- In the Step 3: Verify installation field, enter the URL of any page where you've installed the tracking code
- Click Visit & Verify
- Your page will open in a new tab — the tracking script will detect the verification request and ping Video Stats
- If installation is successful, you'll see the message: "Tracking code verification successful!"
- Back in Video Stats, click Refresh Status to confirm the green "Verified" badge appears
If verification fails, see Troubleshooting below.
How Lead Detection Works
Once installed, the script watches every form submission on the page automatically. It detects:
- Standard form submissions (the most common case —
<form>tags that POST to your server) - AJAX-based submissions (modern forms that submit without a page reload — common in funnel builders and landing page tools)
- Fetch API submissions (used by most modern JavaScript form widgets)
When it sees a submission with what looks like a name and/or email field, it sends that lead to Video Stats with the visitor's dub_id (the cookie that was set when they clicked your tracking link). That's how the lead gets matched to the video.
You do not need to tag your form, add hidden fields, or change anything about how your form works. It works with:
- ConvertKit, Mailchimp, ActiveCampaign, MailerLite embed forms
- ClickFunnels, Kartra, Kajabi, Leadpages opt-in forms
- Custom HTML forms
- Most third-party form builders (Typeform, Tally, etc., when embedded directly)
What If a Visitor Hasn't Clicked a Tracking Link?
If someone lands on your page from Google, social media, or by typing your URL directly — and they haven't clicked one of your YouTube tracking links recently — the lead is not attributed to a video. That's expected: there's no click for the lead to attach to.
Video Stats tracks the click-to-conversion journey. If there's no click, there's nothing to attribute.
Multiple Channels, One Page?
If you manage multiple YouTube channels in Video Stats and they all send traffic to the same landing page, you only need to install one workspace's tracking code. Attribution is based on the click cookie, not the tracking code, so each channel's leads are automatically separated.
For full details on this setup, see Multi-Channel Tracking on a Shared Landing Page.
Troubleshooting
Verification fails after clicking "Visit & Verify"
- Confirm the snippet is in the
<head>section, not the body - Check that the URL you entered actually loads in a normal browser (no login wall, no maintenance mode)
- View the page source on the URL you entered — search for
videostatsin the source. If it's not there, the snippet didn't make it onto the page (most often a cache issue — clear your site's cache and try again) - Disable any aggressive script-blocking plugins or extensions while testing
Leads aren't showing up in my dashboard
- Make sure the visitor came from a Video Stats tracking link. If they clicked your raw YouTube description URL (not a converted tracking link), there's no
dub_idto attribute to. Test the flow yourself end-to-end: click one of your tracking links → arrive on the landing page → submit a test opt-in → check the dashboard a few minutes later (be sure to allow ten minutes)
- Confirm you only have one Video Stats tracking code on the page (multiple snippets can confuse attribution)
- Make sure the form actually submits successfully — failed submissions aren't tracked
My form is custom / unusual — will it work?
If your form is a standard <form> element or uses AJAX/fetch with a name and email field, it will almost certainly be detected automatically. If you're unsure, install the code and submit a real test opt-in — if the lead shows up in your dashboard, you're good.
For non-standard or fully bespoke forms, you can fire a manual lead event from JavaScript. Contact support if you need help with this.
Can I skip this for now and set it up later?
Yes — click Skip Setup in Settings > Tracking Code if you'd like to come back to it later. You won't get lead attribution until you install it, but you can still use Video Stats for click and YouTube analytics in the meantime.